| Hello friends,
Around about every other Sunday, I start thinking about what I might like to share in this newsletter. This past weekend, I received a tweet that got me thinking. (Which reminds me...if you have a question, send me a tweet! Or just respond to this email.)
Anyway, here's the tweet.
| |
| | Okay, so the short answer is yes. I can do that. Scroll down a bit, and I'll show you my scribbles.
But the longer answer is...this is not how I work.
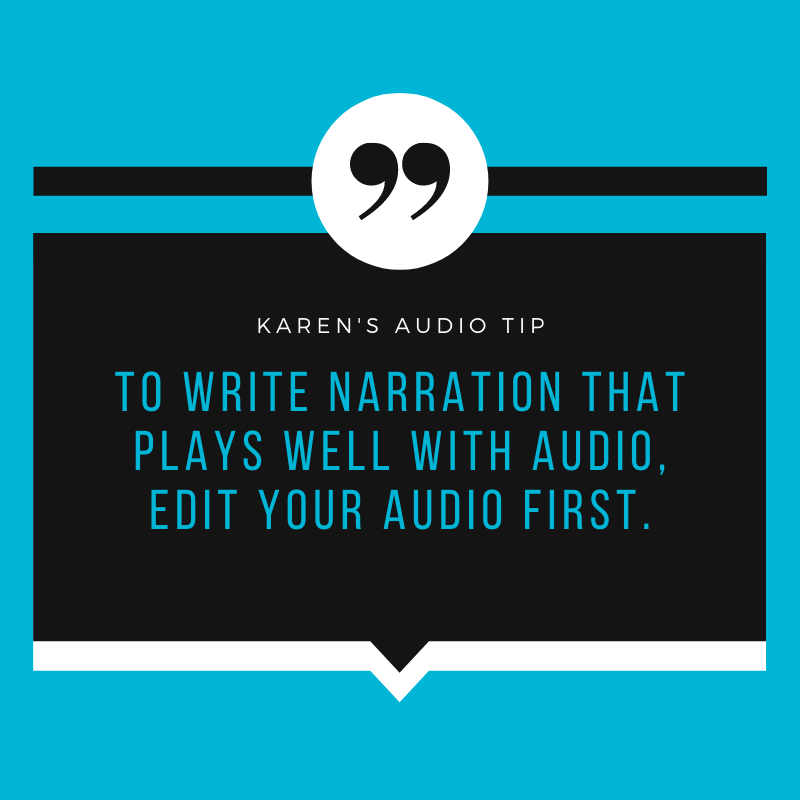
Because at every step of the process, I try really hard to put the audio first. | |
| | When I'm editing another reporter's script, I can always spot when they've been working straight off a transcript.
Often, the script will be filled with long, rambling narration interspersed with long, rambling interview clips.
There will be sentences, maybe even entire paragraphs, where the interview subject sounds completely checked out. Their words look good on paper, but the audio lacks emotion and conviction.
(The best interview clips can be messy. When people are sharing their real truth, they sometimes don't bother to get the grammar exactly right.)
Other transcription-bound reporters have the opposite problem. They build their entire story around short, punchy sound bites. Their script looks great on paper. But when they go to pull their audio, they realize they've written around edits that simply don't work.
(No matter how many hours you spend editing that cut that ends on a word that's mashed together with three other words while your speaker is starting to shout, it just isn't going to work. It's not your editing skills. It's the edit.)
But when someone is working closely with their audio -- instead of with a transcript -- there's an interplay between narration and tape that just sounds … seamless.
This is what we want. | |
| | So, here's what I do…
(And, let me preface this by saying that I've been editing audio since 1991--back when we worked on actual tape with a grease pencil and a razor blade. Editing audio comes natural to me, so I'm not slowing down my process by editing first. I'm actually making it all go faster.)
1. Get rid of the clutter.
Often during an interview, the interview subject goes off on a tangent that doesn't apply to my story. Or I ask a question and discover that the answer is not useful to me. The first thing I want to do is get rid of everything that's completely superfluous, so that it doesn't come back to overwhelm me later.
2. Assemble the anecdotes.
In narrative interviews, we want to get every beat of the story. But our interview subjects often start at the beginning and skip to the end. As we go back and get the missing story beats, we end up with a lot of repetition. And everything's out of order. If you try to put everything together using the transcript, you'll end up with anecdotes that sound choppy and over-edited. So I assemble the anecdotes in audio first.
3. Identify good in/out points.
I'm not going for super polished interview clips here, but I do want to make sure that all of my finished clips are gonna have strong beginnings and strong endings. I put a second or two of silence between them, and hopefully the transcription software will recognize those breaks and insert timecode appropriately.
4. Put everything in rough chronological order.
When telling a story chronologically, it's good to get things in order as soon as possible. That way you're less likely to get confused when it comes time to write.
I do all these things at the same time, so it's not as if I'm listening to the audio 4xs over. But I am getting quite comfortable with the pace and feel of the interview. Later, when it comes time to write my script, I hear my tape in my head. I feel how everything fits together. There's far less second-guessing...and far less rewriting.
Once I've gone through and done my editing, I've usually trimmed an hour long interview to 20 minutes or so. That's when I run it through transcription software.
That means, when I'm looking at a transcription, I've already cut it down to the clips I'm most likely to use.
One quick note: Make sure to leave in the proper names, dates and other important facts, even if they're embedded in otherwise lackluster audio clips. You want those details in your transcript, so you don't have to go hunting through the audio later. Trust me on this. I'm speaking from experience.
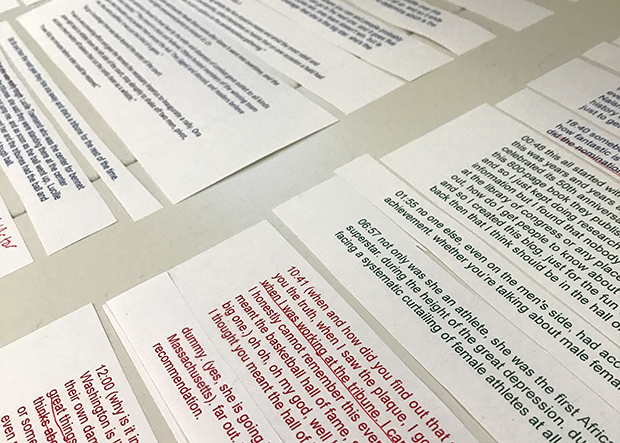
Now, if you have multiple interviews, you might still be wading through pages and pages of transcription. So how do I mark it all up to make sense of it?
So, full disclosure, I like to work with a printed transcript. I know, I know, it's old fashioned and bad for the environment. But it helps.
| |
| | I scribble. I cross things out. I put lots of stars next to things I really like. It gets a little messy, but physically interacting with my transcript helps me see things I might otherwise miss.
(Incidentally, I often try to do this step at a standing desk. Again, breaking out of my usual patterns helps my brain see new possibilities. Plus, I spent way too much time sitting. Standing is better.)
By this point, I've already put the sound in chronological order. So I can often just use the scribbles on my log to pull my selects (the interview clips I've selected to use) into a document. If changes need to be made to the order of things, they're usually minor.
But what about more complicated stories?
I'm glad you asked!
With complicated stories that are on the shorter side (say, 20 minutes or less,) I sometimes cut my log in to strips and lay them out on a big table so I can rearrange them like a puzzle. I jokingly call this the "arts and crafts" method.
| |
| | This is helpful when you have lots of voices and a really complicated structure. But it's totally unnecessary when working with one or two voices and a straightforward chronology.
What about a longer story?
When a story is longer or has more voices, the "arts and crafts" method can feel overwhelming.
I recently did a story where I interviewed seven different people about a very complicated topic. Each interview was at least an hour long. The story could have gone in multiple directions, and I had collected lots of analysis that needed to be interspersed with the chronology. I tried to lay it all out on my kitchen table. But soon I found that my kitchen table wasn't big enough.
The story had way too many voices. Too many possibilities. Too many potential angles. I was utterly overwhelmed.
And pretty quickly, I realized getting a bigger kitchen table wasn't the answer.
Instead, I fired up my trusty Google Docs. | |
| | First, I created a list of headers. These served as chapters to my story. And by using the header function in Google Docs, I found I could easily navigate around my story by just clicking on the list to the left.
[If you're having trouble figuring out your headers, the Post-It note method can be useful. Post-It notes are great for figuring out the big picture, but they're not terribly helpful when you're trying to choose between equally compelling cuts.]
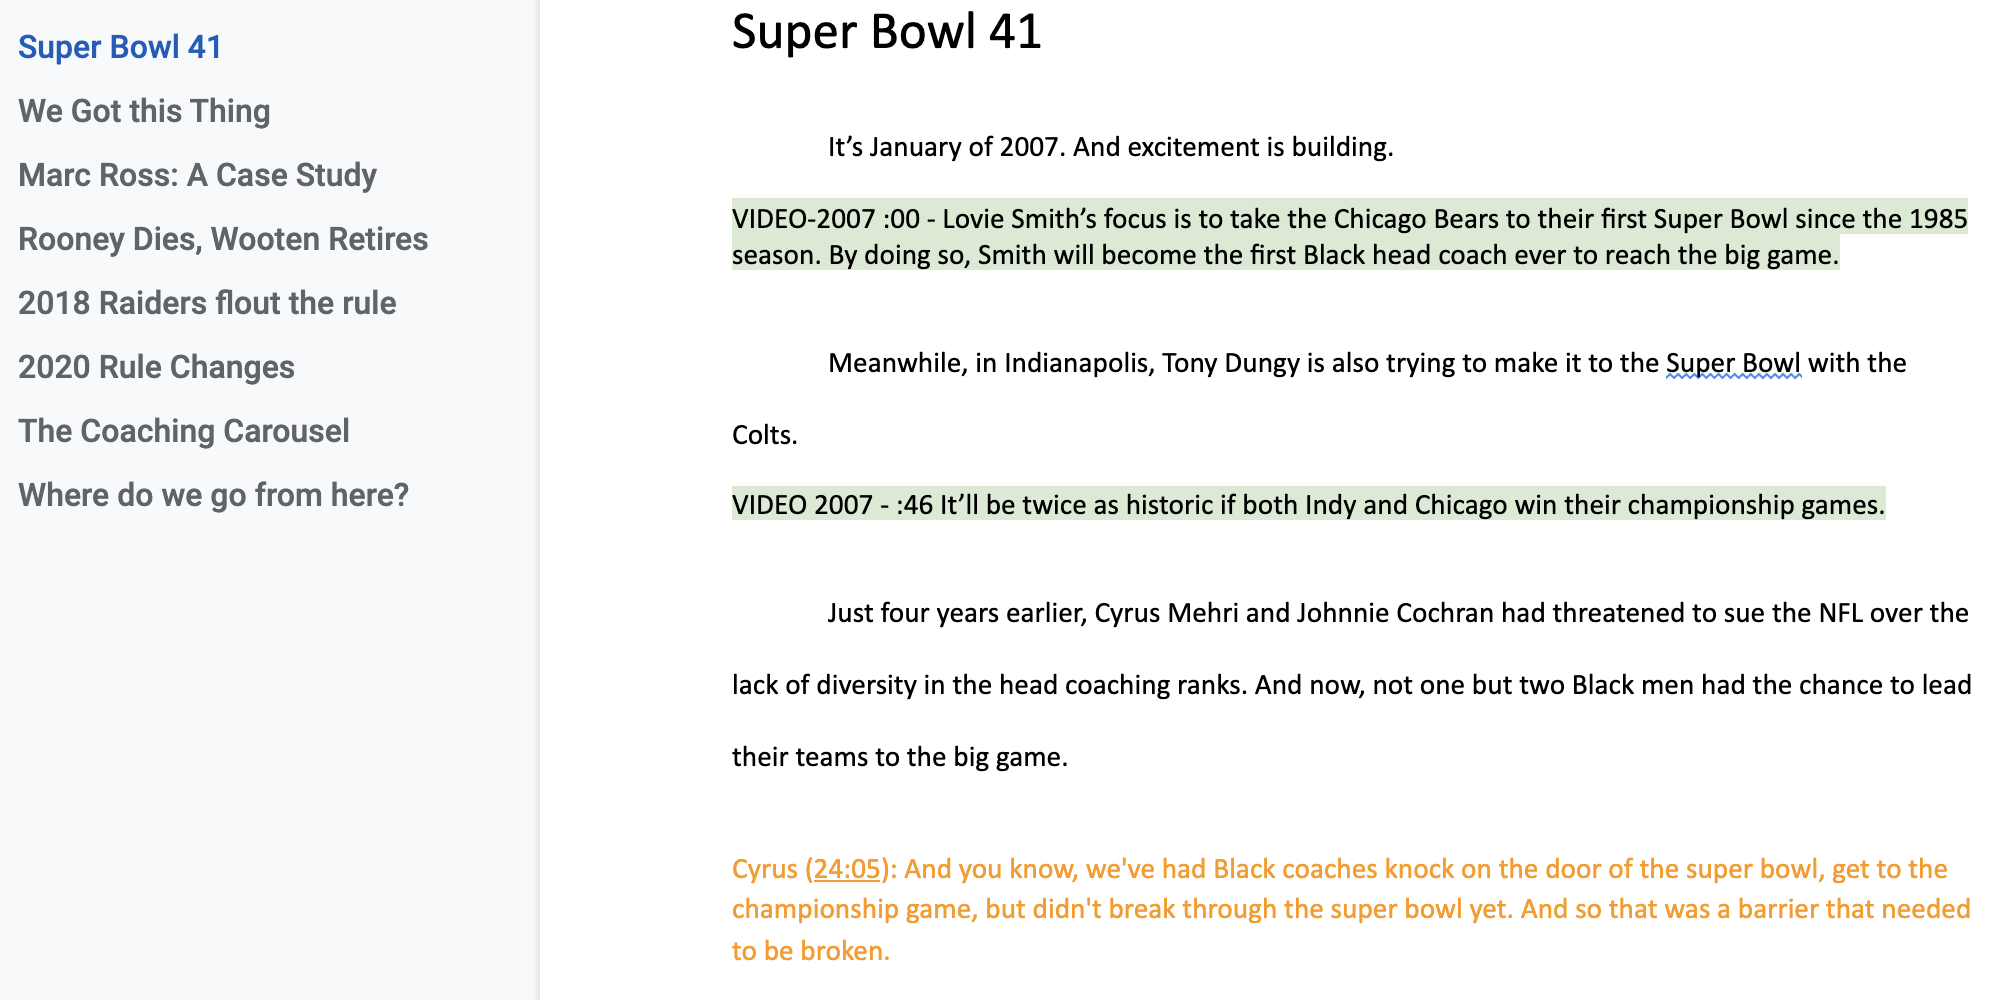
I started to think of each header like a bucket. So, six different people had given me good reflections on Super Bowl 41. I dumped all of those clips into the Super Bowl 41 bucket, not really worrying about order or repetition yet.
Once I had all of my selects in the proper buckets, I could see the big picture. I realized I didn't need six people talking about Super Bowl 41. And trying to introduce five characters in the first two minutes of my story was just a bad idea.
So I dropped one voice because I wanted to introduce her later in the piece. I dropped another because he was a slow talker. I dropped another because he hadn't said anything different from what the others had said. Now I had just three voices, and a much clearer throughline.
I went through the story bucket by bucket, arranging clips chronologially and cutting the fat. This helped me avoid being overwhelmed by the hugeness of it all. At one point, I realized the buckets were out of order, so I rearranged them. And because I was using headers to keep everything neat and tidy, it was relatively easy to cut and paste the story into the right order.
And then -- and this part is important -- once I had all my selects in order, I actually went back to my audio and assembled it. I then had all my cuts -- in order -- and I could listen to them as I wrote my narration.
I try to do this every time I write a story, because I want to be absolutely sure every edit works before I start writing. I want to hear the pace and tone of my clips. I want to make sure everything is going to flow.
Often, during this phase of the writing process, I'll make adjustments to the clips that will really help the interaction between my narration and sound.
And...there it is. My incredibly long-winded and complicated answer to a relatively straightforward question.
And believe me, I know. Whenever I describe my process, it sounds like I must be spending huge amounts of time on all this prep work. Who has that luxury?
But the fact is, I work faster than anyone else I know. And it's not because I'm sloppy, or smart, or just naturally talented. I'm fast because I take the time to think things through. Once I've got a good handle on my story, the actual writing takes almost no time at all.
| |
| 'Butt cut what?' A glossary of audio production terms
Okay, I realize that certain terms used in this message might get confusing. (For example: interview clips = sound bites = selects = cuts. These are all just different ways of referring to the audio you use in a story.) I wasn't able to find a glossary for narrative audio terminology, but I did find this handy-dandy audio production glossary put together by the brilliant and lovely Alison MacAdam. Enjoy! | |
| |